The first step toward reusing your furniture is a creative makeover without spending much money or destroying the environment. Your way to a new home looks with furniture makeovers that are both eco-friendly and budget-friendly. It doesn’t matter if you are faced with a used-up wardrobe or a worn coffee table.
These 8 economical alterations will work for you and let you make great pieces that look great but are not expensive. For one, we will go from the milk paint techniques to the up-cycled hardware solutions as we guide you through the restoration process.
In this manner, you will be mixing great-quality thrift store finds with new fun Instagram looks, taking part in an environmental protection plan, and saving money at the same time.
Get ready to learn professional-grade furniture-flipping secrets that combine both style and sustainability. If you are a novice at DIY home projects, these green makeup ideas will transform your home into a reflection of your style.
They will also help the environment. Get ready to explore these change strategies that exemplify the excellent and inexpensive side of eco-friendliness.
Key Takeaways:
- In order to have your furniture painted environmentally friendly, you should learn a few key preparation steps, including full sanding, proper cleaning, and priming.
- – On the one hand, accurate information is power, and you have a green power. Let’s use this project as a transformation.
- – Master 8 transformation techniques, from vintage cabinet restorations to modern metal upgrades, each designed to work with various furniture pieces and styles.
- – Discover professional furniture flipper secrets for achieving long-lasting, durable finishes that will keep your pieces looking fresh and beautiful.
- – Get insights into color combinations and special effects using green paint colors and complementary tones to create unique, personalized pieces.
Essential Tools and Materials for Green Furniture Makeovers
Starting your furniture makeover journey requires a well-organized toolkit. Let’s explore the essential items you’ll need to transform your furniture pieces into stunning green masterpieces.
Basic Tools
– Electric sander or sanding blocks

– Screwdrivers (both flathead and Phillips head)

– Paintbrushes in various sizes
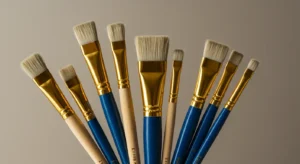
– Paint rollers and foam brushes
– Putty knife and wood filler
– Measuring tape
– Drop cloths
– Painter’s tape
Safety Equipment
– Protective goggles

– Face mask or respirator
– Work gloves
– Well-ventilated workspace
Cleaning Supplies
– Degreaser or TSP substitute
– Clearwater-based cleaner
– Microfiber cloths
– Steel wool (0000 grades)
– Vacuum with the brush attachment
Paint and Finishes
– Quality primer
– Your chosen green paint

– Clear topcoat or sealer
– Paint stirrers
– Paint strainer (if using milk paint)
– Clean mixing containers
Optional but Helpful
– Heat gun (for removing old paint)
– Wood conditioner
– Tack cloth
– Paint sprayer
– Furniture piece repair kit
– Small brush set for detailed work
Remember to invest in quality tools as they’ll serve you well through multiple furniture piece transformations. Store your supplies in a dedicated area to keep them organized and easily accessible for your next project.
(Key takeaway) A comprehensive collection of quality tools and materials is essential for achieving professional-looking furniture makeovers while ensuring safety and efficiency.)
Preparing Your Furniture for Transformation
Before diving into the creative transformation process, proper preparation is crucial for achieving professional-looking results. This foundational step can make or break your furniture makeover project.
Initial Assessment
Take time to thoroughly inspect your piece for any damage, loose joints, or areas needing repair. Look for scratches, dents, or water damage that might require extra attention. This assessment helps you plan your approach and gather necessary repair materials.
A lot of love goes into preparing a piece properly, but this investment of time ensures perfect paint adhesion and a lasting finish. Don’t skip this step, even if you’re eager to start painting – proper prep prevents future problems.
Surface Preparation
Start by doing a complete cleansing with a degreaser that will wipe off all the dirt, oils, and grime. Note the places where hands grab most of the time like drawer pulls and edges as the ones that must be cleaned properly. Remove all hardware and store it safely if you plan to reuse it.
If you notice any paint chip areas or surface irregularities, address these with wood filler or builder’s putty. Allow repairs to dry completely before moving forward. Remember, much prep work now means fewer issues later.
Safety First
Always work in a well-ventilated area and wear appropriate safety gear, including:
– Dust mask for sanding
– Safety glasses for protection
– Gloves when handling chemicals
– Protective clothing to keep clean
This preparation stage requires lots of repair patience, but it’s essential for achieving professional results that will stand the test of time.
💡 (Key takeaway) Proper preparation through thorough cleaning, repairs, and safety measures creates the foundation for a successful furniture transformation.)
Cleaning and Repairs
These are 3 easy-to-make natural alternatives to toxic chemicals, which can be used to clean your furniture. This eliminates years of dirt, grime, and old wax that can prevent paint from sticking. Focus carefully on coating detailed areas and crevices where buildup has a way of accumulating.
First, clean your piece of furniture well with warm water and mild soap. This strips away years of dirt, grime, and old wax that can affect how well the paint sticks. Focus on areas that tend to collect dust and precise places that harbor build-up.
For stubborn stains or grease spots, use a degreaser specifically designed for furniture. Work in small sections, ensuring each area is completely clean before moving on. Remember to let the piece dry thoroughly before proceeding with any repairs.
Next, assess any damage that needs attention. Fill holes and cracks with wood filler, matching the color as closely as possible to your intended finish. For larger repairs, consider using wood putty or builder’s bog for added strength. Sand these areas smooth once dry.
Check for loose joints or wobbly legs – these issues need addressing before painting. Apply wood glue to loose joints and clamp them until completely dry. New hardware: If any of your hardware is broken, or you’re missing pieces, replace them to ensure your piece is structurally sound.
If your furniture smells musty, put it in the sun for a few hours, and spray a vinegar solution to neutralize any odors. This extra step will ensure your transformed piece brings only beauty to your space, not unwanted smells.
💡 (Key takeaway) A thorough cleaning and proper repairs create the perfect foundation for a successful furniture transformation that will stand the test of time.
Sanding and Priming Tips
A smooth finish begins with the right surface preparation. Give it a light sanding with 120-grit sandpaper to give your fresh paint a solid base to hold onto. Target rough areas and old paint drips, but do not over-sand, because this could damage the wood.
For stubborn areas or glossy surfaces, step up to medium-grit sandpaper. This is my go-to technique for guaranteeing excellent paint adhesion. Always sand in the direction of the wood grain to avoid nasty scratches.
After sanding, clean the surface with a tack cloth rid of all dust particles. This process is very important as it prevents dirt from being locked underneath your paint layer.
For optimal results, apply a quality primer designed for furniture. It might feel like a tedious process but is really vital in order to get a professional-looking finish and longevity out of your paint job.
💡 (Key takeaway) A successful furniture makeover starts with sanding and priming — this helps paint stick better and creates a more durable finish.
Choosing the Perfect Green Paint
The journey to selecting the ideal green paint for your furniture transformation can be both exciting and overwhelming. With countless shades and finishes available, it’s essential to understand how different greens can impact your space.
Green paint brings nature’s calming essence indoors while adding character to your furniture pieces. From soft sage to bold emerald, each shade creates a unique atmosphere. When selecting your green paint color, consider the room’s lighting and existing decor to ensure harmony.
Understanding Green Paint Types
Milk paint offers an authentic, vintage look perfect for antique pieces. This powdered milk paint creates a unique, slightly textured finish that ages beautifully. It’s eco-friendly and provides excellent coverage, making it ideal for sustainable furniture makeovers.
Chalk paint and mineral paint are other excellent options. Silk mineral paint provides superior durability and a smooth finish, while chalk paint offers that coveted matte look. Both require minimal preparation and adhere well to most surfaces.
Selecting the Right Shade
Consider these factors when choosing your green paint:
– Room lighting natural light can significantly affect how the color appears
– Furniture-style traditional pieces often suit deeper greens, while modern items work well with brighter tones
– Room size Lighter greens can make spaces feel larger, while darker shades create intimacy
– Existing decor Choose a shade that complements your current color scheme
For a timeless look, consider muted greens like sage or olive. These versatile colors work well in various settings and maintain their appeal over time. If you’re feeling bold, deep forest greens or vibrant emeralds can create stunning statement pieces.
💡 (Key takeaway)Choose a green paint that aligns with your furniture style, room conditions, and desired aesthetic while considering the paint type’s application and durability characteristics.
Popular Green Paint Options
Milk paint stands out as a top choice for eco-conscious furniture makeovers, with Lucketts Green from the MMS Milk Paint line being particularly popular. This vibrant sage green shade offers excellent coverage and creates a beautiful vintage finish that’s perfect for antique pieces.
Silk Mineral Paint provides another excellent option, known for its superior adhesion and durability. Their green palette ranges from soft sage to deep forest tones, making it versatile for various furniture styles.
Top Green Paint Recommendations
– Miss Mustard Seed’s Lucketts Green is Perfect for farmhouse and vintage styles
– Dixie Belle’s Spanish MossIdeal for creating deep, rich finishes
– General Finishes Emerald Excellent for modern furniture pieces
– Fusion Mineral’s Park BenchGreat for subtle, sophisticated looks
– Annie Sloan’s Amsterdam Green is Perfect for bold, statement pieces
Not only are these paints eco-conscious, but they provide unparalleled coverage and durability as well! Many come in a powdered form, which minimizes packaging waste and shipping costs, so they’re pretty eco- and budget-friendly.
(Key takeawayEco-friendly green paint options like milk paint and mineral paint provide excellent coverage while maintaining environmental consciousness, with popular choices including Lucketts Green and Silk Mineral Paint.)
Color Combinations and Effects
Mastering color combinations with green can elevate your furniture pieces from simple to stunning. The versatility of green allows for countless creative possibilities that can transform any space.
Pairing with Neutrals
Green works beautifully with neutral tones like white, beige, and gray. The deep tone of the green color creates a sophisticated contrast when paired with lighter shades. Try combining a darker color on the exterior with crisp white interior drawers for a striking effect.
Metallic Accents
Gold and brass hardware pop magnificently against green furniture. The beautiful blue-grey color undertones in some green paints particularly complement metallic finishes, adding an elegant touch to your piece.
Wood and Green Harmony
Natural wood elements paired with green create an organic, earthy feel. Consider leaving some wood exposed or applying a light stain to complement your chosen green shade. This combination works especially well for pieces with detailed trim or carved elements.
Layered Effects
Create depth by layering different green shades. Start with a darker base coat and layer lighter greens on top, or try dry brushing techniques for a textured appearance. This method adds character and visual interest to flat surfaces.
💡 (Key takeawayStrategic color combinations and layering techniques with green can create stunning furniture pieces that serve as focal points in any room.)
8 Budget-Friendly Green Furniture Transformations
Giving old furniture a glamorous new look doesn’t have to break the bank. Let’s explore eight incredible makeovers that combine creativity with cost-effectiveness to breathe new life into forgotten treasures.
-
Cabinet Refresh with Vintage Charm
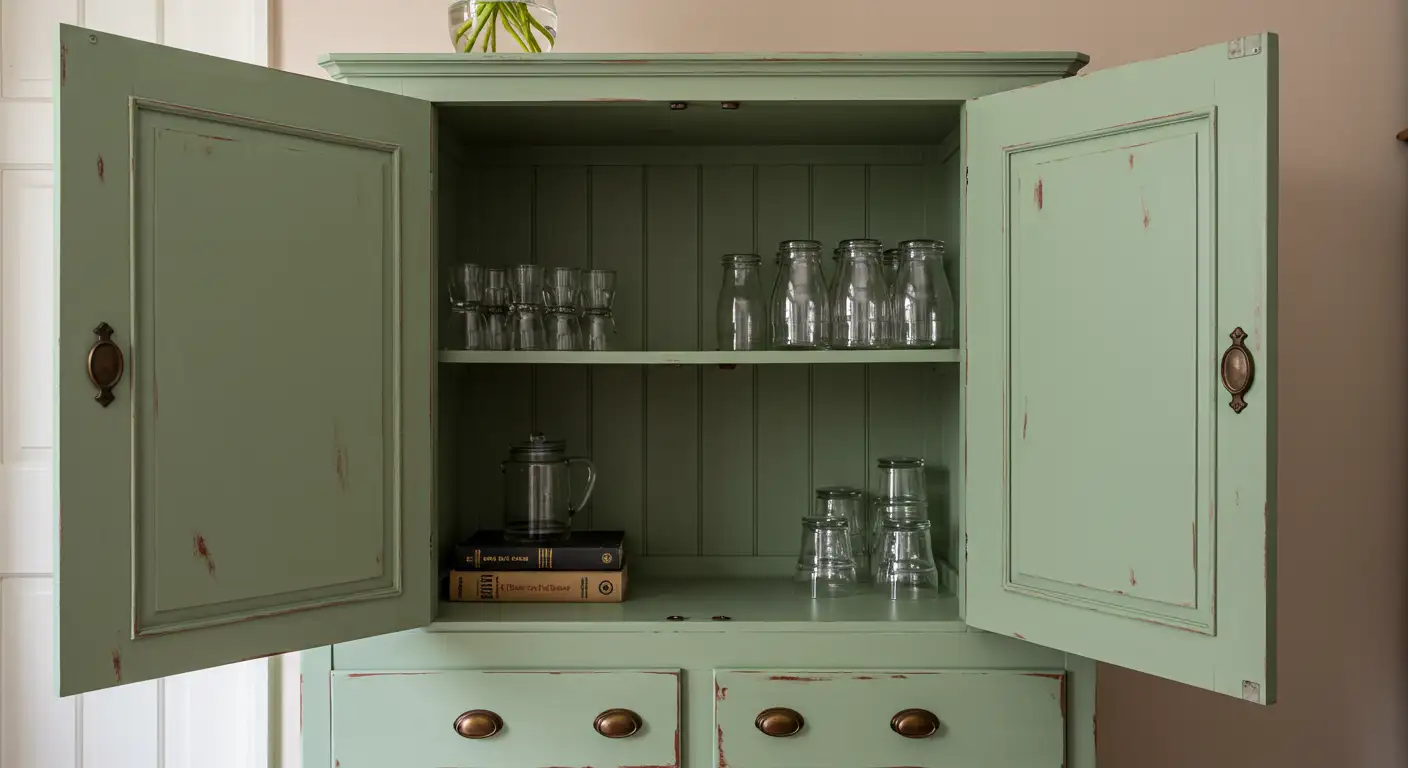
This curbside cabinet was a lucky find that needed just a little cabinet love. The inside of this old cabinet has a fresh coat of sage green, while the exterior features a distressed finish. The metal cabinet hardware was updated with vintage-style pulls, creating a perfect blend of old and new.
- Bedside Tables Revival
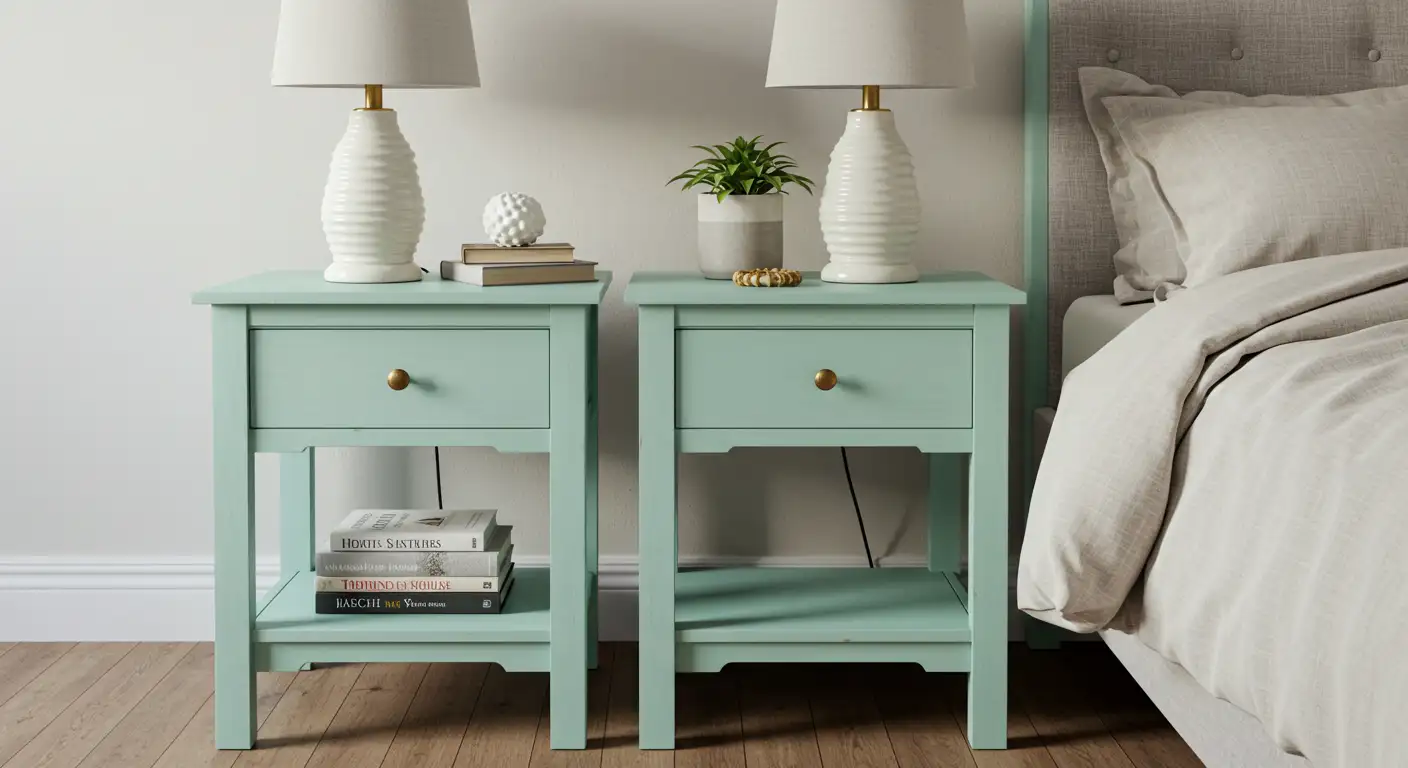
A pair of bedside tables found at a thrift store for $20 got a different look with mint green paint. The fresh new look included updated hardware and subtle distressing on the edges. This transformation proves that small changes can make a big impact.
-
Bench Makeover with Character
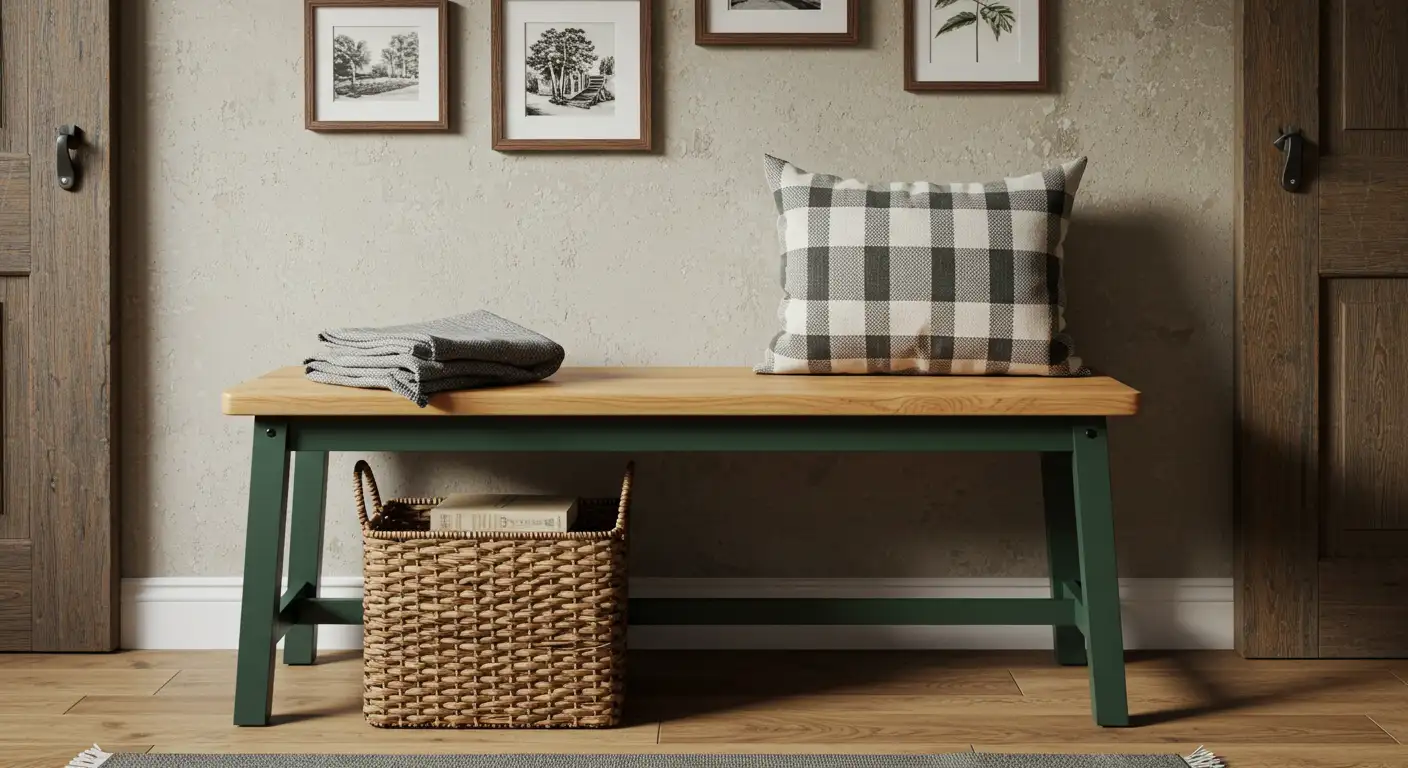
An old wooden bench got a complete overhaul with forest green paint. The top of this bench received a touch of timber stain, creating a beautiful contrast. Simple techniques and affordable materials resulted in a stunning piece that looks high-end.
-
Statement Piece Transformation
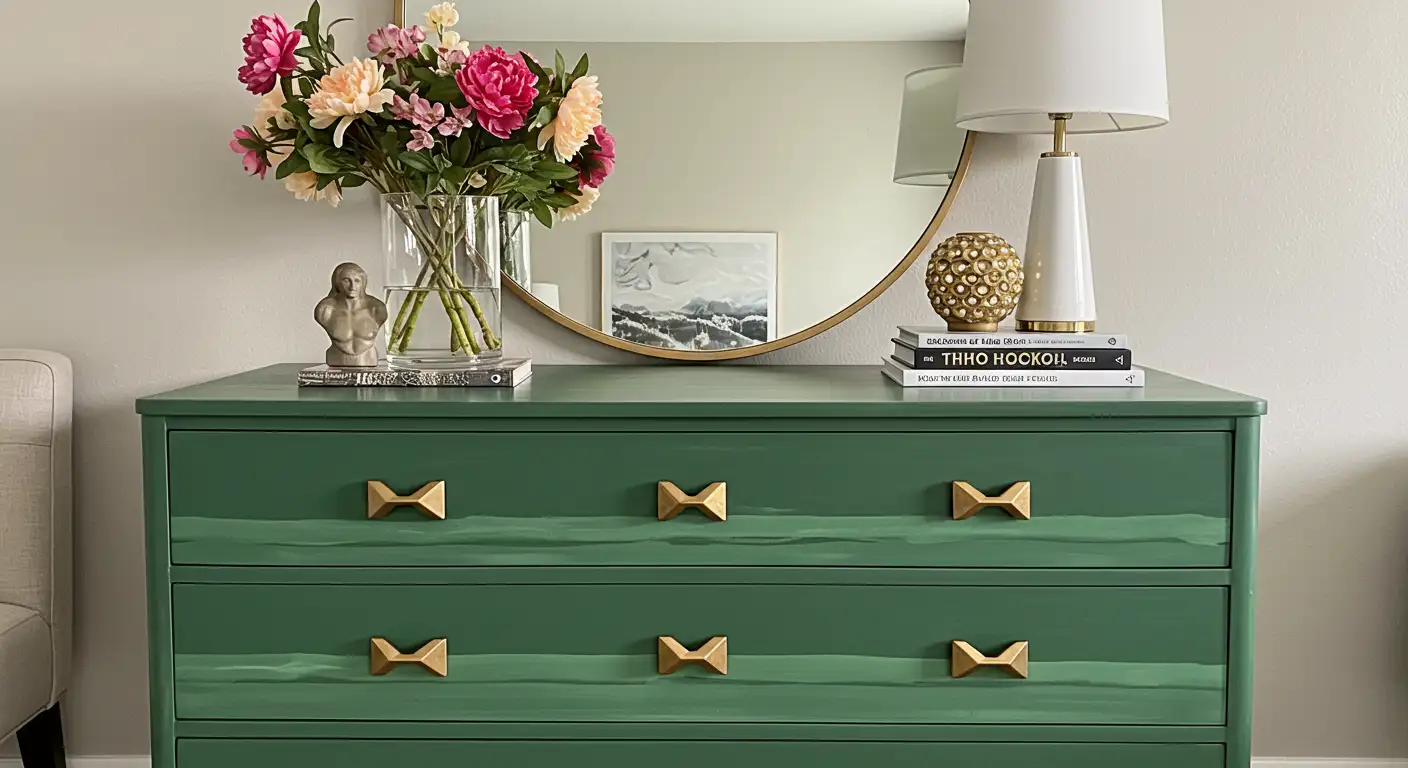
What started as a creative outlet turned into a happy surprise with this dresser makeover. Using different application techniques, including dry brushing and layering, created depth and character that exceeded expectations.
-
Whitewashed Wonder
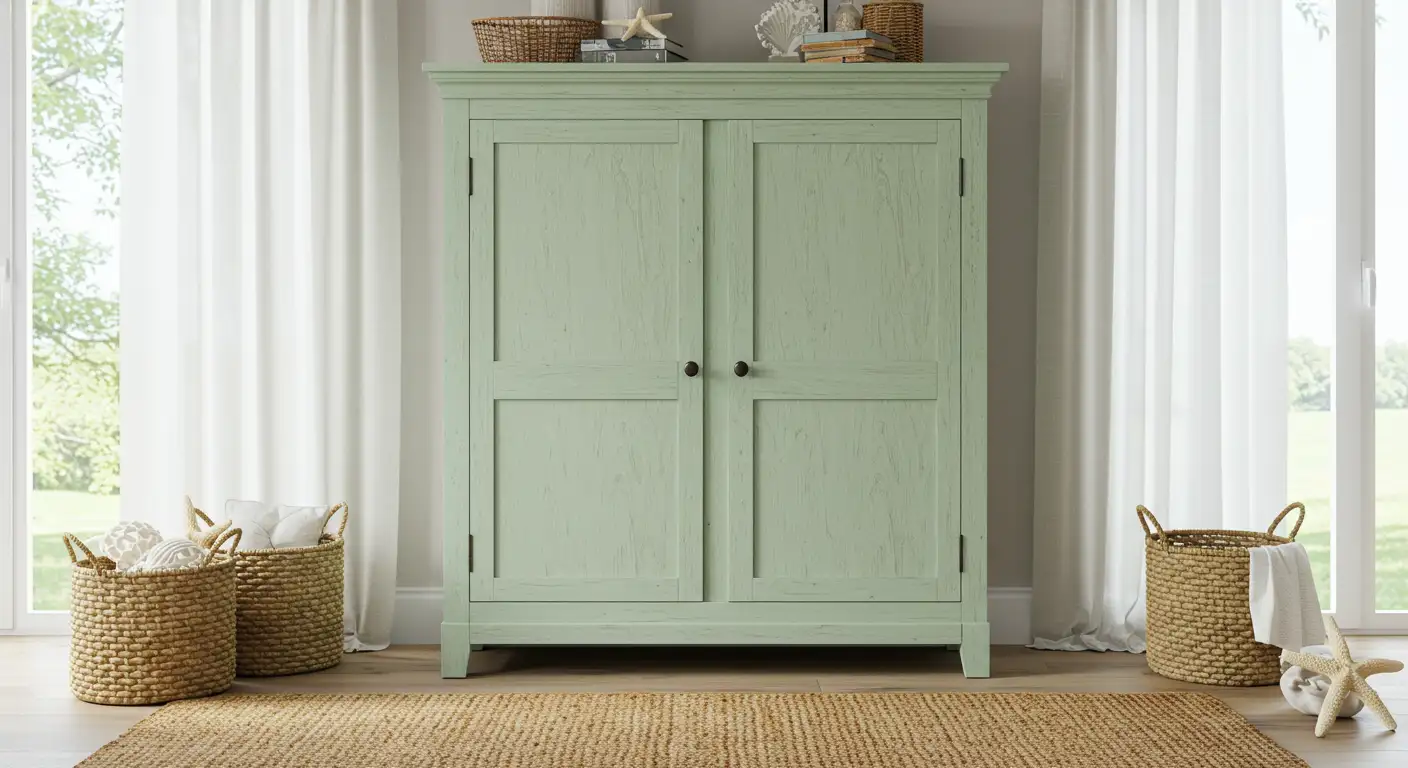
This sweet piece underwent a dramatic change using a whitewash mix of water and paint, followed by a gentle greenwash. The technique created a soft, weathered appearance that adds charm to any room.
-
Modern Metal Upgrade
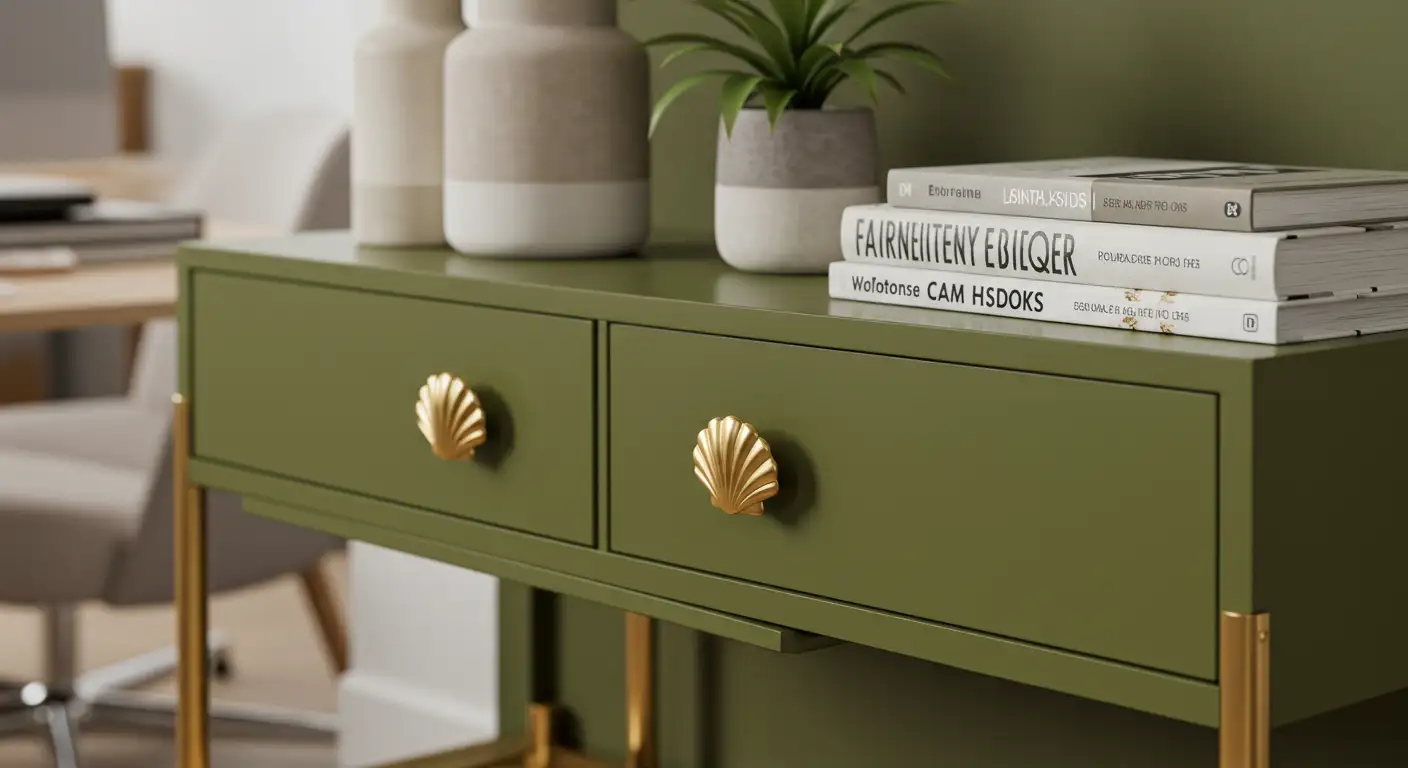
A basic metal shelf unit transformed into a contemporary masterpiece with olive green paint. New shell knobs and additional product details like gold-tipped legs elevated the piece from basic to boutique-worthy.
-
Two-Tone Treasure
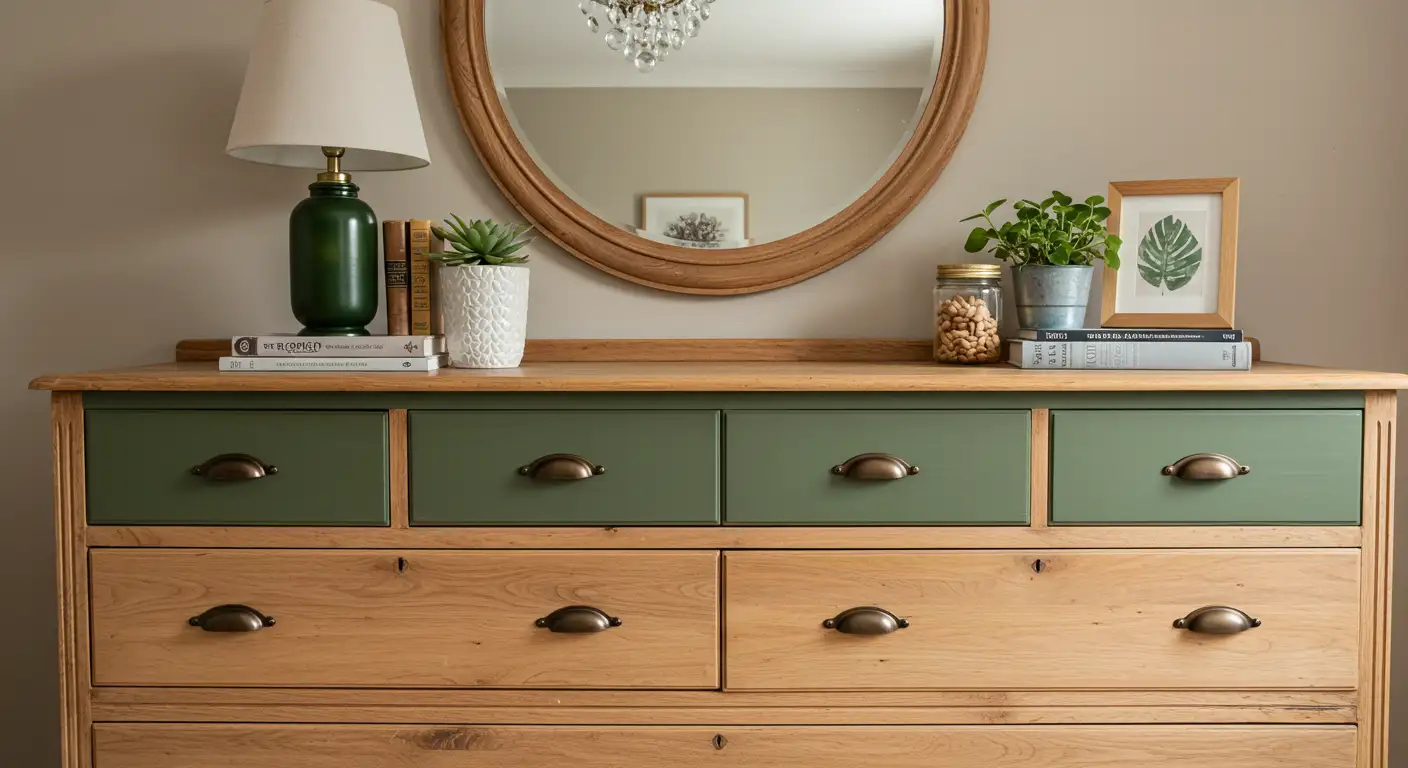
The choice of myrtle green paint combined with cream created this adorable green masterpiece. The two-tone effect adds visual interest while maintaining a cohesive look that works in any decor style.
-
Vintage Cabinet Restoration
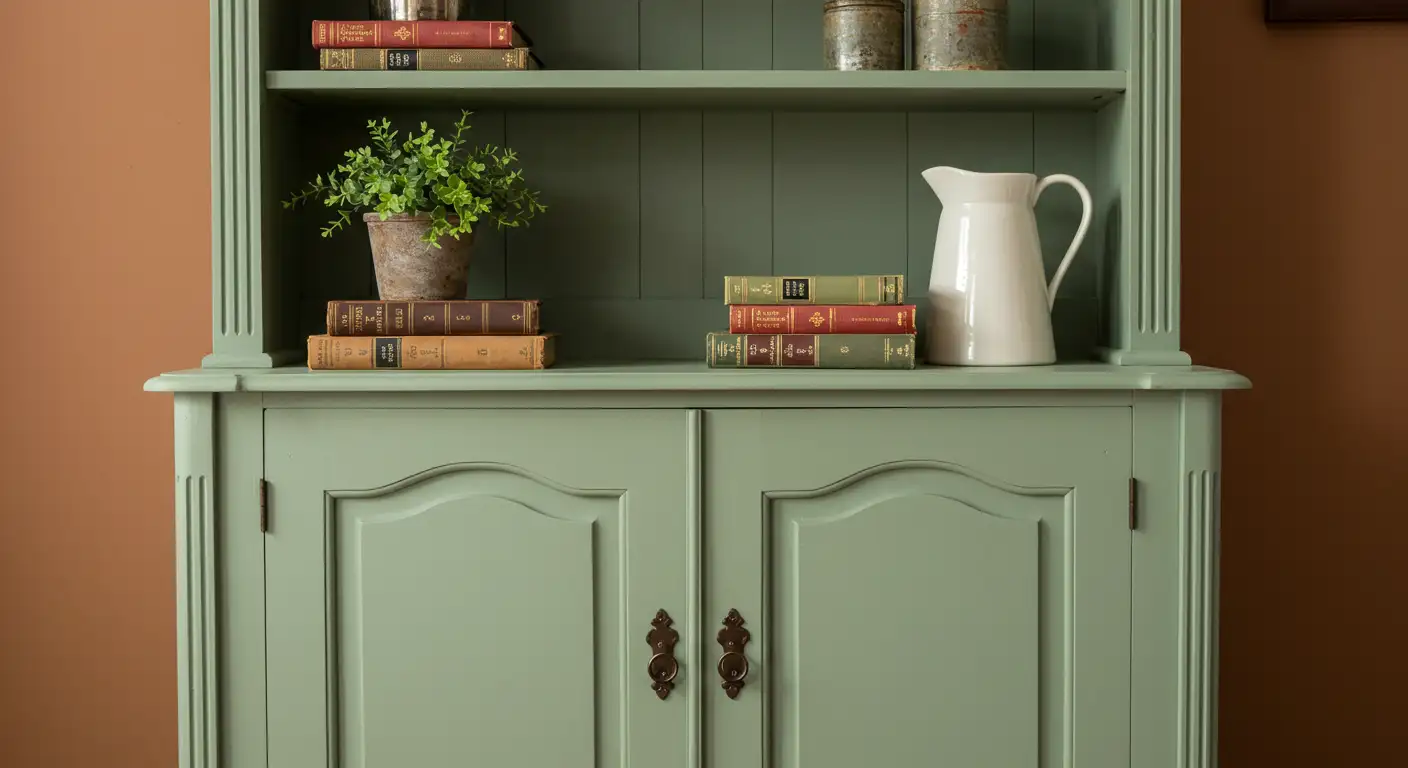
This furniture flip adventure turned a worn-out cabinet into a showstopper using everyone’s favorite color – green. The transformation included repairs, fresh paint, and updated hardware, proving that vision and patience can create amazing results.
These are all examples of how basic tools, a little bit of imagination, and a very reasonable budget can create professional-level results. The trick is selecting the correct paint, giving yourself time to prepare, and being detail-oriented.
💡 (Key takeaway) With planning and creativity, pieces that are budget-friendly can produce exceptional results that make pieces more expensive than retail looks, and eco-friendly processes.
Cabinet Refresh with Vintage Charm
Transform an old, discarded cabinet into a stunning vintage masterpiece with this budget-friendly makeover. This curbside cabinet, once destined for the landfill, now serves as a beautiful storage solution with character.
The inside of this old cabinet received special attention with a soft, muted green shade that perfectly complements its exterior. The original hardware was preserved and restored, adding to its authentic vintage appeal.
A clever combination of distressing techniques and strategic paint application helped maintain the cabinet’s time-worn charm while giving it new life. The metal cabinet’s worn edges were gently sanded to reveal hints of the original finish, creating natural-looking wear patterns.
This little cabinet proves that even the most modest pieces can become statement-worthy with thoughtful restoration. The transformation cost under $30, including paint and cleaning supplies, making it an incredibly cost-effective project.
💡 (Key takeaway)A simple curbside cabinet can be transformed into a charming vintage piece with the right techniques and a modest budget.
Bedside Tables Revival
Give a set of old, boring bedside tables a dramatic makeover with this gem of a project for less than the cost of a coffee trip. First, scrub the surfaces down thoroughly, and fill the scratches and dents with wood filler. A little sanding prepares the ideal surface for your shiny new style.
Opt for a calming shade of green that suits your sleep space color story. Use thin coats of paint and allow appropriate drying time between coats. If you want a little more character, you could distress the edges a bit to expose some raw wood underneath.
Update the hardware with vintage-inspired pulls or modern handles to complete the transformation. A protective clear coat ensures your refreshed bedside tables will maintain their different look for years to come.
💡 (Key takeaway)With minimal investment and some creative vision, dated bedside tables can be transformed into charming, personalized pieces that elevate your bedroom’s aesthetic.
Bench Makeover with Character
Go from functional bench to outside talking point by mixing rustic and modern elements. Choose a bench with good bones — even if it’s beat-up, that’s part of its future character.
Begin with a thorough cleaning to remove years of built-up grime. Sand down any rough spots, paying special attention to the seating area for comfort. Add a touch of timber stain to highlight the natural wood grain in select areas, creating depth and visual interest.
Choose a muted sage green for the base to maintain that vintage appeal while keeping it fresh and current. The top of this bench can be enhanced with a slightly darker tone to create dimension and protect against wear and tear.
Consider adding decorative elements like subtle distressing on the edges or a delicate stencil pattern on the seat. These small details will give your bench that sought-after character-rich appearance without overwhelming its simple beauty.
💡 (Key takeaway)A thoughtful combination of timber stain, sage green paint, and strategic distressing can transform a basic bench into a character-filled statement piece that adds charm to any space.
Statement Piece Transformation
Transform an ordinary piece into a stunning focal point by embracing bold design choices and unexpected color combinations. Start with a solid wood piece that has great bones but needs a fresh perspective.
The magic lies in layering different application techniques. Begin with a base coat of your chosen green shade, then add depth through strategic distressing or glazing. This creates visual interest and character that makes the piece truly unique.
Consider incorporating decorative elements like stencils or hand-painted details to elevate the design. These creative outlets allow you to express your artistic vision while adding significant value to the piece. Sometimes the most beautiful transformations come as happy surprises when you experiment with different techniques.
For hardware, opt for statement pieces that complement your design. Vintage-inspired pulls or modern geometric handles can completely change the personality of your furniture. The key is choosing elements that enhance rather than compete with your creative vision.
💡 (Key takeaway)Bold design choices and layered techniques transform ordinary furniture into extraordinary statement pieces that become the focal point of any room.
Whitewashed Wonder
The technique transforms an everyday piece into a coastal-inspired masterpiece with its whitewashed effect. With a mixture of one part white paint and three parts water, you will create a sweet piece to hang that is equal parts rustic and modern.
The beauty of this transformation lies in its subtle layering. Start by applying the whitewash mix of water and paint in thin, even coats. Let each layer dry completely before adding the next. This gradual buildup allows the wood grain to peek through, creating depth and character.
For dimension, after the final coat has dried, lightly distress the edges with fine-grit sandpaper. This technique emphasizes the natural curves of your furniture but with that all-important shabby-chic feel.
For protection and longevity, top with a clear water-based topcoat to seal your creation. The result? A piece that adds a breath of fresh air to any space and teaches us that sometimes, the smallest makeovers can have the biggest impact.
💡 (Takeaway)A whitewashed finish is a cost-effective way to add a light, airy feel and maintain the natural beauty of the furniture item.
Modern Metal Upgrade
Turn that old-fashioned metal furniture into a sleek, modern piece for little cost. Use a degreaser to clean the metal surface thoroughly, removing any rust or debris. A wire brush can deal with stubborn spots.
Apply a metal primer specifically designed for your furniture type. This crucial step ensures the paint adheres properly and prevents future chipping. Once dry, sand lightly for a smooth surface.
For the perfect finish, use high-quality spray paint in your chosen shade of green. Apply thin, even coats, allowing each layer to dry completely. Consider adding new shell knobs or modern handles to elevate the piece’s appearance.
To protect your work, seal with a clear water-based topcoat. This additional product not only preserves the paint job but also adds a professional sheen to your furniture.
💡 (Key takeaway)A modern metal upgrade combines proper surface preparation, quality materials, and contemporary hardware to create a stunning transformation that looks professionally done.
Two-Tone Treasure
Transform an ordinary dresser into an extraordinary masterpiece with this stunning two-tone treatment featuring the elegant choice of myrtle green paint. The top drawers showcase a rich, deep green hue while the bottom maintains its natural wood finish, creating a perfect balance of color and texture.
The adorable green shade breathes new life into this vintage piece while preserving its original character. By keeping the bottom portion in its natural state, we’ve created a visually interesting contrast that draws the eye and adds depth to the overall design.
To achieve this look, we carefully sanded and prepped only the top drawers, allowing the wood grain to peek through slightly for added character. The natural wood bottom grounds the piece, making it versatile enough to complement various decor styles.
This transformation proves that sometimes less is more – you don’t need to paint the entire piece to make a significant impact. The strategic use of color creates a high-end look while maintaining budget-friendly simplicity.
💡 (Key takeaway)A two-tone approach using myrtle green paint creates a sophisticated balance between modern color and natural wood, delivering maximum impact with minimal investment.
Vintage Cabinet Restoration
It was this adorable makeover – we took a shabby vintage cabinet to a new life. The piece was worn, with scratch marks and some water spots, but because of its solid construction, it was a great candidate for restoration.
We started by gently stripping away years of built-up grime and old finish. After a thorough cleaning, we discovered beautiful wood grain patterns that would complement our furniture flip adventure. The cabinet’s original hardware was preserved to maintain its authentic vintage appeal.
For the finish, we chose a soft sage green that perfectly balanced the cabinet’s traditional character with a fresh, contemporary feel. This go-to color choice was life-changing, turning the piece into something beautiful and also versatile enough for many home styles.
The last step was to paint a sturdy clear coat to shield the finish and jurisdiction of the cabinet’s beauty for years to come. We love how this restoration project shows how vintage pieces can be mindfully updated while still retaining their original character.
💡 (Key takeaway) For this vintage cabinet restoration, both selecting the right solution and preserving a variety of original features led to the ultimate mix of vintage and contemporary appeal.
Professional Tips for Long-Lasting Results
So, are you ready to level up your flipping skills? Follow these pro tips to help your green makeovers stand the test of time.
Proper Sealing Techniques
Always seal your painted furniture with a durable topcoat. For green pieces, use a clear water-based sealer to prevent yellowing. Apply 2-3 thin coats, sanding lightly between each layer for the smoothest finish.
Regular Maintenance
Keep your transformed pieces looking fresh by dusting them weekly with a soft microfiber cloth. Avoid harsh chemical cleaners that can damage the finish. For stubborn marks, use a gentle soap solution and dry immediately.
Temperature Considerations
Keep everything at a controlled temperature (between 65-75°F). Very high or low temperatures will encourage or discourage paint from adhering to the surface and how long it takes to dry. Allow each coat to be completely dry before adding the next.
Quality Over Speed
Don’t rush the process. A properly executed makeover that takes longer will outlast a quickly done project. For furniture flippers looking to make this their flipping career, remember that reputation builds on quality work.
The mesmerizing world of furniture makeovers requires patience and attention to detail. When in doubt, take extra time with prep work – it’s always the best decision for lasting results.
(Key takeawayProfessional-quality furniture transformations require proper sealing, regular maintenance, controlled working conditions, and patience to achieve long-lasting, beautiful results.)
Conclusion
Give your furniture a greener makeover and remember that every piece has its tale to tell. When you opt for eco-friendly methods and materials, you’re not just renovating your home — you’re paving the way for a greener tomorrow.
These budget-friendly tips demonstrate that style and sustainability are compatible attributes. Whether you’re rescuing an old-timey cabinet or refreshing a worn-out bench, the options are endless.
Feel free to explore colors, textures, and techniques that help you to make pieces that more closely match your personality. Each makeover will give you new confidence and skills that will make you become the display case of your creativity and sustainability.
So, get your tools out, pick up that paintbrush, and start transforming your furniture into green pieces today! Your wallet, your home, and the planet will be grateful. Happy makeover-ing!
FAQs
How long should I let it dry between coats when using eco-friendly paint on furniture?
With eco-friendly paint, allow 2-4 hours between coats. Drying time will vary based on humidity and temperature. For top-coat application, make sure the paint layers are fully cured by waiting 24 hours before re-sealing the paint surface with a protector top coat.
Can the green furniture makeover techniques be applied to outdoor furniture?
Yes, you can transform outdoor furniture using eco-friendly methods. However, ensure you use weather-resistant paint and sealants specifically designed for exterior use. Apply multiple protective top coats to withstand various weather conditions and UV exposure.
What’s the best way to fix deep scratches before starting a green furniture makeover?
Fill deep scratches with eco-friendly wood filler or make a natural paste using sawdust and wood glue. After the filler dries completely, sand the area smoothly for perfect paint adhesion. For very deep gouges, consider using multiple layers of filler.
How to paint the look distressed with natural paint?
Apply each layer of paint in a different color, allowing each to dry before adding the next, for a distressed look. Use sandpaper to gently wear away the top color in strategic areas, revealing the base color. Finish with a clear water-based sealer for protection.
Is it possible to remove old paint without using harsh chemical strippers?
Yes, try using natural alternatives like citrus-based removers or heat guns. You can also make a paste using baking soda and water for gentle paint removal. Those methods may take longer, but they’re better for both you and the environment.
If my eco-friendly paint bubbles, what are my options for fixing a problem in progress?
Paint bubbling typically happens due to insufficient surface preparation or high humidity. Make sure you clean and dry before painting. If the paint starts to bubble, allow it to dry fully, sand any bubbles, and repaint thin coats.